When I started learning React.JS , I went through a lot of tutorials and videos. I gained a lot of theoretical knowledge, but they were of no use. So, I thought, why not build a very plain and simple app that would help me understand React practically. So, I built this simple calculator.
The final UI looks like this —
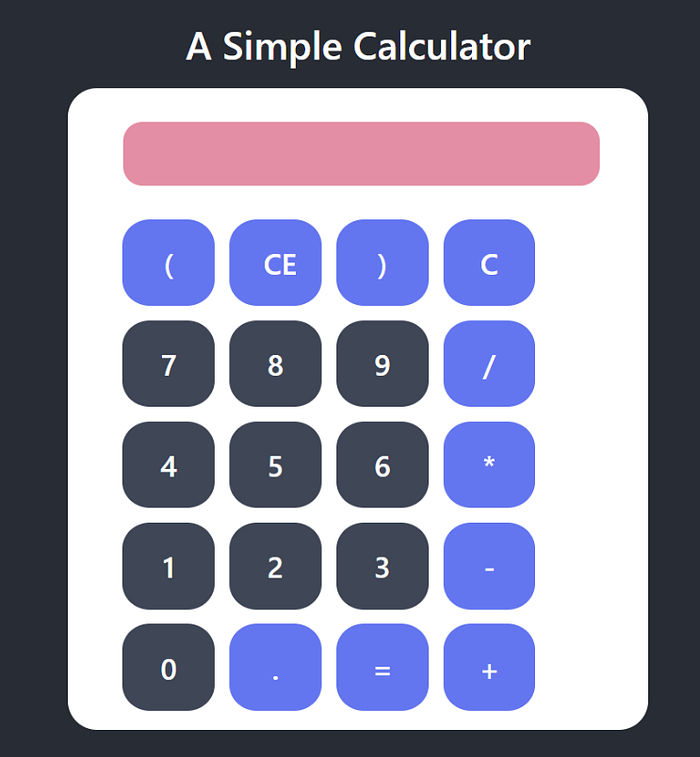
You can find my source code at github :-https://github.com/premdas92/MyCalulator
I created the React app using create-react-app command, removed all the unnecessary things that were present in App.js, and I was good to go.
I love making beautiful interfaces so I focused a little more on the HTML, CSS and color combinations. You can go plain if you wish to. But, I believe that your work should be eye-catching. So, I used beautifulcolor combinations.
I created a folder called components inside src folder. I created two components called KeypadComponent and ResultComponent. You can have only one component if you like. Inside both the components, we will have one JS file called index.js and one SASS file called *component-name*.scss. For example :- KeypadComponent.scss and ResultComponent.scss
I would like to add one more thing before moving forward. I always like to write SASS rather than CSS. Each JS file will have their own SASS file. So, rename App.css to App.scss.
To convert SASS to CSS, we need to install some packages.
npm install node-sass sass-loader
Our KeypadComponent will look something like this :-
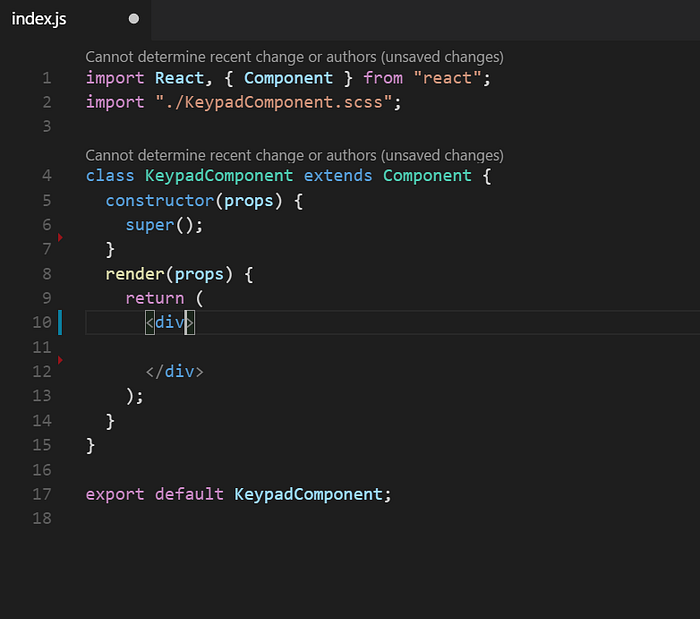
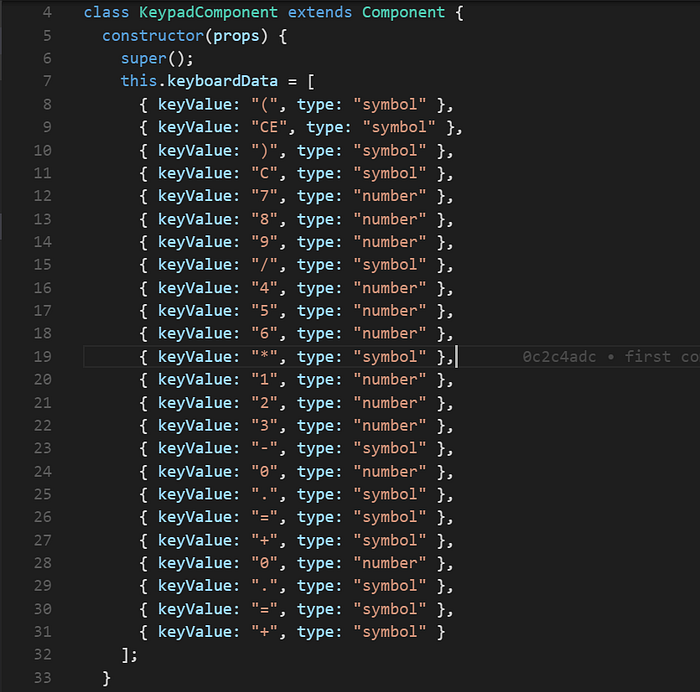
So, first of all we need to design our keypad. For this, we will need numbers and symbols. So, I created a json data inside the constructor block with two keys — keyValue and type. The type key is used because I want to differentiate between the symbol and the number. Based on this key, I will assign different colors to the buttons.
Now, I will arrange four keys in a row. For that I will map this json data to my DOM.
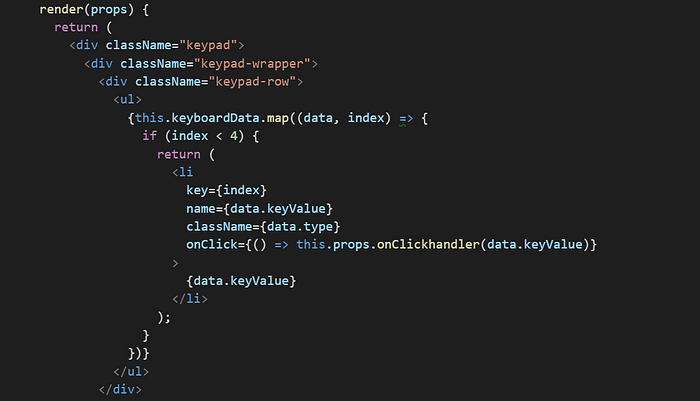
I have just attached a small part of the code. Please refer my github for full source code.
The onClickhandler function will take the “key symbol ” as input and it will process the data. Lets have a look at the ResultComponent.js now.
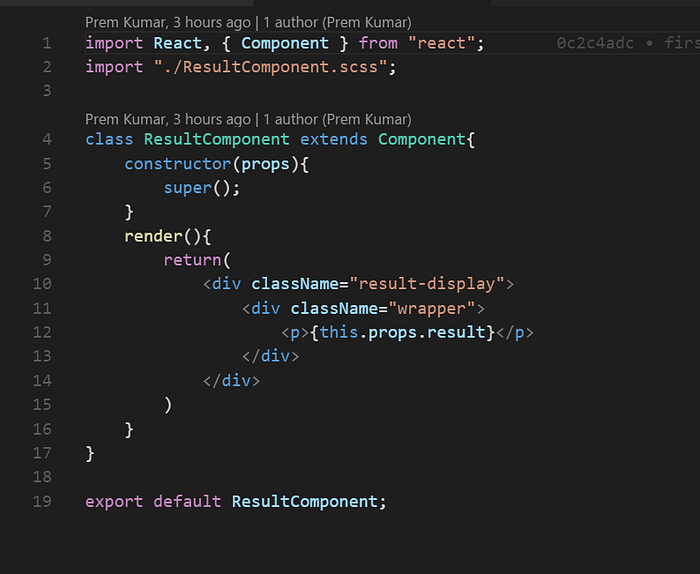
The ResultComponent will have a <p> tag which will display the result.
We have created two components now. Both needs to be imported to the parent file i.e, App.js file.
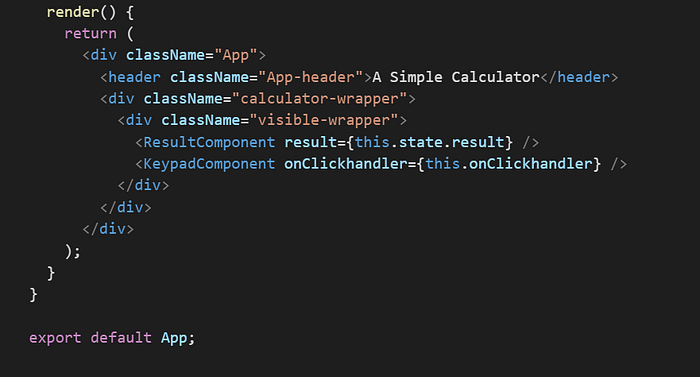
We have to define all the functions inside App.js file and we will send the data to the respective components.
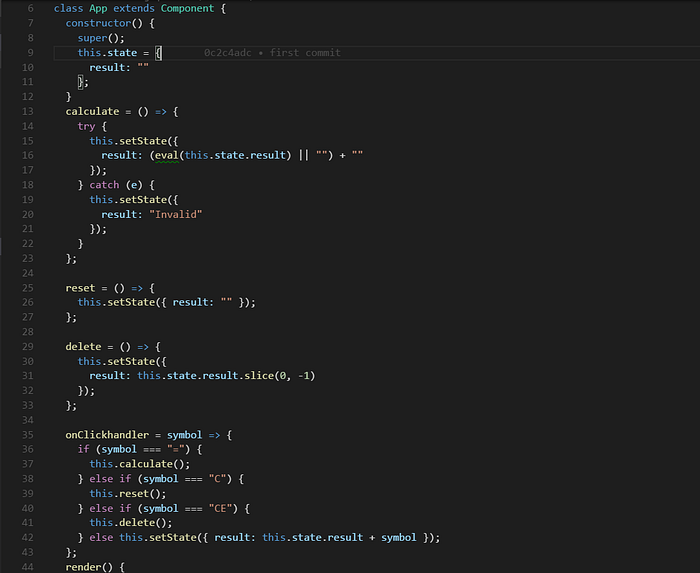
Here, Clickhandler functions takes the pressed button as input, it validates it and does the required job. If the pressed button is “=” , it calls the calculate function and calculates the result. The state of the “result” gets changed and that state is passed to the ResultComponent and displayed there.
If the pressed button is “C”, it calls the reset function and if it is “CE”, it calls the delete function.
After the calculator starts working, add a little bit of CSS with beautiful color combinations to give it a good look.
Find my final source code here — https://github.com/premdas92/MyCalulator
