User login using Google is pretty easy and very helpful as we do not have to take care of the credentials and validations. Google does it for us.
I will just explain a simple login and logout form using React which will look like the below picture when the user logs in. It will show the user’s name and his / her email id.
You can find my full source code in my github repo. https://github.com/premdas92/GoogleLogin

I am just assuming that you know how to set up a react app using create-react-app. So, I will move forward.
Install node-sass by running the command “npm install — save node-sass”. I use SASS to beautify my components. SASS maintains the hierarchy of the classes and prevents styles from getting overridden.
Moving on, clear all the unwanted things from App.js and you are ready to proceed. First of all, we need to install an npm package called ReactGoogleLogin . Run the following npm command :-
npm install --save react-google-login
You can refer the below link if you want to know more about the npm package.
You will notice from the above code that I have not used the default Google Login button. Instead I have customized it using SASS.
Also, I am declaring some states — userDetails and isUserLoggedIn. The response from the responseGoogle function gives many data. But I have filtered the data and stored the filtered data into userDetails state. Using the isUserLoggedIn state, I am checking whether the user is logged in or not.
As soon as the user logs in , the Log In button should go away and the user details should appear. Same in case of logout. The user details should go off and Log In button should appear. I am playing around with the states and implementing these functionalities. React has got a very beautiful feature called states, using which you can do anything.
Did you notice that I have not given the clientId in the above code ? It has to be generated by you. I will guide you step by step.
Step 1:- Go to Google Developer’s console. Click on the top left corner of the bar and select the project or create a new project. Refer the below screenshot.


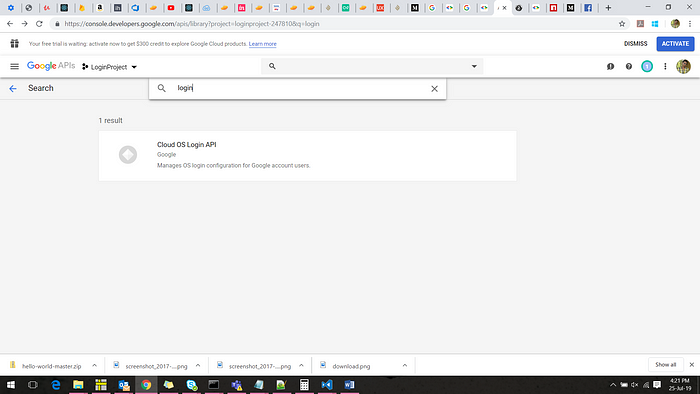
Step 2 :- We need to activate the login API which we are going to use. Search for login and you will get “Cloud OS Login API”. Select the API and click on “ENABLE”

Step 3:- You will see the below page. Click on Create credentials > OAuth client ID

Step 4:- . You will be redirected to other page as below. Check in “Web Application” and give the domain name as “https://localhost:3001” or any port name at both the places — Authorized Javascript origins and Authorized redirect URLs. Click on Create.

Step 5 :- Copy the client ID and paste it in App.js. You are good to go now.

Give a proper shape to your DOM and beautify it with colors.
You can find my code on github :- https://github.com/premdas92/GoogleLogin
Thank you for reading this article. Stay in touch !!